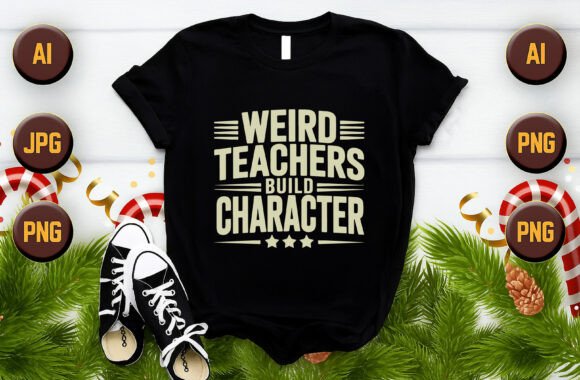
Weird Teachers Build Character – Vector: A Practical Asset for Custom Merchandise and Creative Projects
The phrase “Weird Teachers Build Character” resonates with anyone who has ever had a memorable educator—one whose unconventional methods left a lasting impression. It’s a sentiment that works perfectly on apparel, home goods, and promotional items. But turning that idea into a high-quality, scalable product requires more than a clever phrase; it needs a well-prepared vector file that can be adapted across multiple formats and products without losing sharpness or color fidelity. The Weird Teachers Build Character – Vector bundle provides exactly that: a print-ready, production-friendly asset designed for creators, small business owners, and anyone looking to bring this message to life on T-shirts, mugs, hoodies, pillows, and more.
What Is the Weird Teachers Build Character – Vector Bundle?
This bundle is a collection of digital files that give you full control over how the design appears on your chosen product. The core of the asset is a vector graphic—meaning the artwork is defined by mathematical curves rather than pixels, so it scales cleanly from a small sticker to a large poster without any degradation. The package includes:
- 1 PNG file – Print-ready at 4500×5400 pixels, 300 DPI, with a transparent background. Ideal for quick uploads to print-on-demand platforms or for use in raster-based editors like Photoshop.
- 1 EPS file – A standard vector format compatible with most professional design tools (CorelDRAW, Illustrator, Affinity Designer).
- 1 JPG file – A high-resolution raster preview for quick mockups or reference.
- 1 AI file – Native Adobe Illustrator format, preserving layers and editable elements for custom color changes or layout adjustments.
- 1 PDF file – A portable vector format that can be opened by virtually any design application or sent directly to a printer.
All files are compressed into a single ZIP archive. You’ll need extraction software such as WinRAR or 7-Zip to unzip them. Once extracted, the design is ready to be placed on endless product types: T-shirts, sweatshirts, mugs, throw pillows, stickers, journals, posters, and more.
Where Does a Vector Design Fit in Your Workflow?
A vector asset like this isn’t just a pretty graphic—it’s a tool that fits into multiple stages of a project or business process. Whether you’re a solo creator designing a small merchandise run for a teacher appreciation event, or a print-on-demand seller launching a full line of quirky apparel, the vector file streamlines the entire production cycle.
Before the Project: Preparation and Planning
When you first purchase the Weird Teachers Build Character – Vector bundle, spend a few minutes exploring the files. Open the AI or EPS file in your vector editor to check layer names, stroke widths, and color palettes. This upfront clarity ensures that later adjustments—like changing the font color or resizing the artwork for a mug versus a hoodie—happen quickly and consistently. If you plan to offer the design on multiple colors of T-shirts, pre-define a few color swatches (e.g., black text for light shirts, white for dark) and save them in your vector file’s color panel. This saves hours of tweaking later.
During the Project: Production and Export
The real power of a vector shows up during production. For print-on-demand, you can upload the PNG directly to platforms like Printful, Teespring, or Amazon Merch. The 300 DPI resolution and transparent background mean no messy white rectangles around your design. For screen printing, hand off the EPS or AI file to your printer—they can separate colors, adjust sizing, and create halftones if needed. If you’re making a family of products (a T-shirt, a tote bag, and a mug), use the vector file to generate consistent sizing: for a standard mug (about 8.5 inches wide at 300 DPI), you might export a grayscale PNG of the design at 2550 pixels wide. For a front-center T-shirt, export at around 4500 pixels wide. Because the vector is infinitely scalable, you can create all these variations from one master file without quality loss.
After the Project: Organization and Repurposing
Once your initial product run is live, archive the ZIP file and any modified versions in a well-labeled folder structure. For example: Assets / Weird Teachers / Vector / Original and Assets / Weird Teachers / Mockups. When you decide later to create a sticker pack or a throw pillow, you can go back to the clean vector instead of trying to extract artwork from a compressed JPEG. This habit keeps your creative library modular and prevents a headache six months down the line.
Integrating the Vector with Tools, Platforms, and People
A vector file interacts best when matched with the right tools. Here are common scenarios and how this asset fits in:
- Adobe Illustrator or Affinity Designer – Use the AI or EPS file to edit text, swap colors, or add a second color accent. For instance, you might change the word “Weird” to a different hue to make the typography pop against a dark shirt.
- Canva or Photoshop – Open the PNG file on its own layer. Canva doesn’t handle layered vectors well, so the transparent PNG is your best bet for quick mockups or social media posts promoting your product.
- Print-on-Demand Providers – Many POD services accept PNG with transparent backgrounds directly. Some also allow SVG uploads—but since SVGs are not in the bundle, you can easily generate one by opening the EPS in Illustrator and exporting as SVG.
- Screen Printers – Send the EPS or AI file with a clear note on color separations and the desired print size. Most printers prefer vectors over rasters because they can scale to any mesh screen.
- Etsy or Amazon Sellers – If you’re listing digital products (e.g., a cut file for Cricut or Silhouette), the EPS and AI files are already compatible with those machines. You can also include the PNG for users who only need a simple cut layer.
The vector design also interacts with your physical workspace. If you’re heat-pressing T-shirts at home, print a mirror image version of the design from the vector file onto transfer paper. Because the file is transparent, registration is easier—you can see exactly where the design will land on the garment.
Practical Implementation Tips for Smooth Workflows
Getting the most out of the Weird Teachers Build Character – Vector bundle comes down to a few execution details:
- Extract everything properly. The files come zipped. Use a dedicated extraction tool (WinRAR, 7-Zip, or built-in macOS archive utility) to avoid corruption. Keep the original ZIP as a backup.
- Work from the vector files (AI or EPS) for primary edits. The PNG is a flattened export—good for final production, not for easy editing. Always edit the source vector, then export fresh PNGs for different uses.
- Stay organized with naming conventions. After modification, save with descriptive names like WeirdTeachers_WhiteText_DarkBG.eps or WeirdTeachers_HoodieFront_300dpi.png. This is especially important if you manage multiple product variants.
- Check product templates before finalizing. Most print-on-demand services provide downloadable templates for their products. Overlay your PNG on the template at the recommended size. Because your vector file can be exported at exact pixel dimensions, you can match the template perfectly.
- Consider the base color of your product. A design that looks great on a white T-shirt may disappear on a black one. Use the vector to quickly create a reversed or colored variant. If the design includes thin strokes, thicken them slightly for dark garments to ensure the ink covers any weave texture.
Example 1: A Small Batch for a Local Teacher Appreciation Event
A parent-teacher organization wants to order 50 custom T-shirts for their “Weird Teacher” appreciation day. The volunteer organizer buys the vector bundle, opens the AI file in Illustrator, and changes the main text color to match the school’s spirit colors. They export a PNG at 300 DPI at the exact dimensions required by the screen printer (e.g., 12 inches wide for adult L/XL shirts). The printer receives a clean file, no rework needed, and the shirts arrive in time for the event. Afterward, the same vector is used to print a batch of stickers for students, scaled down to 3 inches wide.
Example 2: A Print-on-Demand Storefront Focused on Educator Humor
A small business owner launches an Etsy shop selling funny teacher merchandise. They upload the Weird Teachers Build Character PNG directly to their Printful account for a unisex T-shirt. A week later, a customer asks if the same design is available on a mug. The owner opens the same AI file, exports a square PNG suitable for a mug (roughly 8×8 inches at 300 DPI), and adds a new product listing. Because the vector handles the resize instantly, the product goes live in minutes.
Example 3: A Freelance Graphic Designer Creating a Client’s School Merchandise Line
A designer is hired by a school district to produce a line of apparel for staff and students. The client loves the “Weird Teachers Build Character” concept. The designer starts with the vector asset, adjusts the typography layout to fit a chest logo format, adds a small mascot icon (also a vector) beside it, and exports six color variants: black, navy, and maroon for T-shirts, plus a white variant for dark hoodies. The final AI file is handed off to the client’s printer as the master. The designer saves time by not building the text layout from scratch.
Long-Term Use and Quality Control
Quality control with a vector asset is straightforward because the source file never loses resolution. However, there are a few practices that extend the asset’s lifespan:
- Keep the original weirds. Every time you modify the AI or EPS, save a copy instead of overwriting the original. This lets you revert if a client wants the exact original later.
- Test print before bulk runs. For any new product type (e.g., pillow, mug), do a single test print. The vector should render crisp edges and solid fills. If you notice pixelation on a mug, your export resolution may be too low—re-export at the product’s recommended DPI.
- Beware of rich black vs. black ink. If printing on dark garments, ensure your vector uses a rich black (CMYK: 60C, 40M, 40Y, 100K) for a solid, deep black that doesn’t wash out. The original file likely uses simple black; adjust as needed for screen printing.
- Update for seasonal or themed variations. Because the vector is editable, you could quickly create a version with a fall color palette or a “Books Weird Teachers Love” spin-off. The underlying layout stays the same.
The Weird Teachers Build Character – Vector bundle is more than a design file—it’s a production-ready component that fits into a systematic workflow. Whether you’re a hobbyist printing one hoodie for your sister who’s a teacher, or a merchandiser managing a catalog of apparel, this asset saves time, preserves quality, and lets you focus on the actual product rather than file conversions. Extract the ZIP, open the AI, and start building your next product line with confidence. The weird teachers of the world deserve it.